
 GROWTH GUIDE
Geo Targeting Google Ads: Cut Wasted Spend in 2026
Set your Google Ads campaigns to presence-only targeting if you serve a defined geographic area, then immediately run a location performance report and add exclusions for every ZIP code or region you cannot serve. That single combination, changing the advanced location option and building an exclusion list, does more for local ad efficiency than almost any other setting in the platform.
Three things to do right now:
- Open any active campaign, go to Settings → Locations → Advanced search, and confirm the advanced location option is set to “Presence: People in or regularly in your targeted locations” rather than the default “Presence or interest.”
- Pull a location performance report (Reports → Predefined reports → Geographic) and sort by cost to find where your budget is going.
- Exclude locations for every area you cannot serve. Exclusions override inclusions, so this is the fastest way to stop irrelevant clicks.
The rest of this guide walks through every layer of Google Ads location targeting, from setup to measurement to advanced configurations for multi-location businesses.
Table of Contents
- What geo targeting in Google Ads actually does for local advertisers
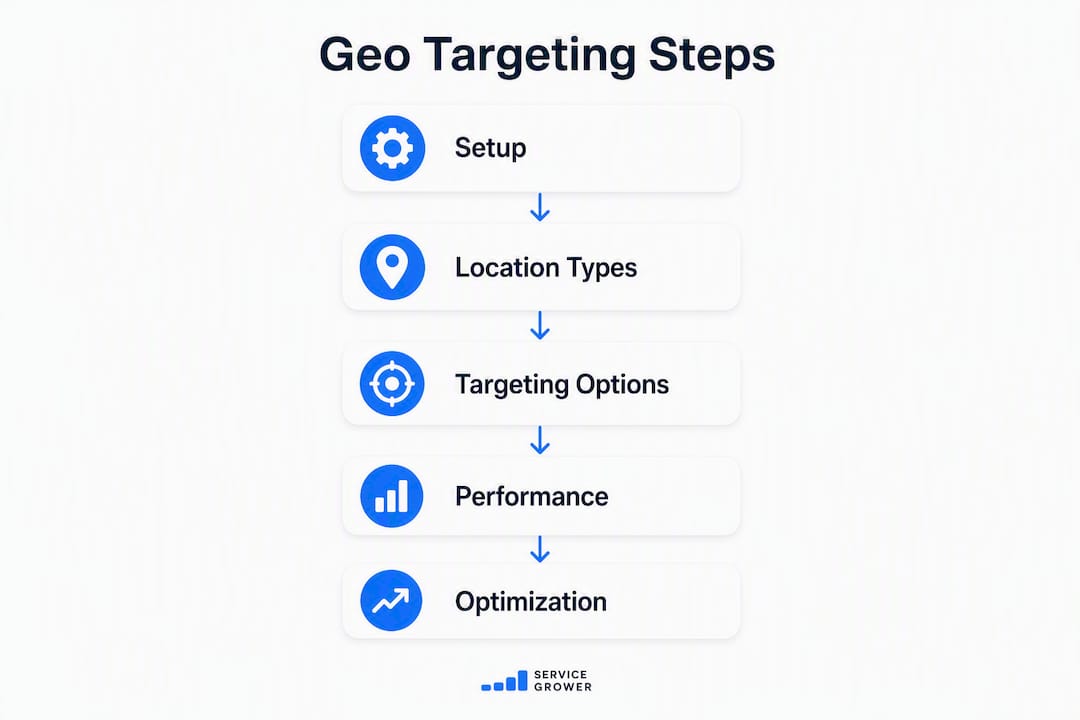
- Types of location targeting you can use in Google Ads and when to pick each
- How Google decides which users are “in” a targeted area
- Step-by-step setup: exactly where to change location targeting in Google Ads
- Practical best practices and conservative rules local advertisers should follow
- How to measure location performance and optimize by geography
- Common geo-targeting mistakes and how to fix them
- Advanced techniques and local use cases: store visits, service-area businesses, multi-location rollouts
- How Service Grower helps implement and scale geo-targeted Google Ads
- Key Takeaways
- Why most local advertisers get geo targeting backwards
- What a managed geo-targeting setup actually looks like
- Useful sources and further reading
What geo targeting in Google Ads actually does for local advertisers
Google Ads location targeting, the platform’s formal term for what most advertisers call geo targeting, lets you control which geographic areas can trigger your ads. You can target an entire country, a state, a city, a postal code, a radius around a point, or a curated location group such as airports or business districts. For a local business, that control is the difference between paying for clicks from people two states away and paying only for clicks from people who can actually walk through your door or book your service.
The practical use cases are straightforward:
- Store-visit campaigns: A retail shop targets a 5-mile radius around its address to capture nearby shoppers.
- Service-area businesses: An HVAC company targets specific ZIP codes it covers and excludes the rest of the metro.
- Regional promotions: A restaurant chain runs a limited-time offer only in the three cities where the promotion applies.
- Multi-location rollouts: A franchise tests a new market by adding one city at a time and comparing CPA before expanding.
Geographic targeting is one of the most direct levers for budget efficiency because it aligns your ad reach with your actual service coverage. Spending on clicks from areas you cannot serve is not just wasteful — it actively inflates your cost-per-acquisition figures and makes campaigns look worse than they are.
Types of location targeting you can use in Google Ads and when to pick each
Google Ads supports countries, regions or states, cities, postal codes, radii around a point, and location groups. Each has a different reach-to-precision trade-off.

| Targeting type | Best use case | Effect on impressions | Effect on CPA |
|---|---|---|---|
| Country | National brand, e-commerce with nationwide shipping | Very high | Lowest precision |
| Region / state | Regional service provider, state-level promotions | High | Moderate |
| City | Single-market local business | Moderate | Better precision |
| Postal / ZIP code | Service-area business with defined coverage zones | Low to moderate | High precision |
| Radius / proximity | Storefront, event venue, or any point-of-interest business | Variable (depends on radius size) | High precision when sized correctly |
| Location groups | Airports, universities, places of interest, or Business Profile locations | Niche | Highly contextual |
A few practical notes:
- Radius targeting requires a minimum radius of 1 km in most contexts. Targets smaller than that may not serve reliably because Google enforces minimum privacy thresholds for small audiences.
- Location groups tied to your Google Business Profile let you target people near your verified business address without manually entering coordinates.
- Postal codes work well for service-area businesses, but you need to build and maintain the list. A plumber covering 12 ZIP codes should include all 12 and exclude adjacent ones where they do not operate.
- Keep in mind that location target types vary by country, so postal code targeting available in the US may not exist in every market.
Pro Tip: Start with city or ZIP-level targeting rather than a broad radius. A radius centered on your address can bleed across municipal boundaries and pull in areas you do not serve. ZIP codes give you cleaner edges.
How Google decides which users are “in” a targeted area
This is where many advertisers lose money without realizing it. Google’s location targeting is a best-effort projection, not a precise geofence. It synthesizes multiple signals to estimate where a user is or what they care about:
- Device GPS and location settings (most reliable signal)
- IP address (less reliable, especially on mobile networks)
- Google account activity and home/work locations saved in Maps
- Search query content — someone typing “plumber in Austin” signals interest in Austin regardless of where they physically are
That last signal is the crux of the presence vs. interest distinction.
Presence or interest (default): Your ad can show to someone physically in your target area AND to someone outside it who is searching for things related to your area. A traveler in Chicago searching “best HVAC company in Dallas” could see your Dallas HVAC ad under this setting.
Presence only: Your ad shows only to people Google believes are physically in or regularly in your targeted locations. The traveler in Chicago does not see it.
For most local service businesses, presence-only is the right call. A roofing company in Phoenix has no reason to show ads to someone in Seattle who is curious about Phoenix roofing. Switching to presence-only typically reduces impression volume but improves conversion rate because the audience is genuinely reachable.
Pro Tip: Sensitive verticals like healthcare, legal services, and financial advice benefit most from presence-only. If your service requires the customer to be physically present or within your service area, presence-only is non-negotiable.
Step-by-step setup: exactly where to change location targeting in Google Ads
The UI path is the same for most campaign types. Here is the exact sequence:
- Sign in to Google Ads and click Campaigns in the left navigation.
- Select the campaign you want to update.
- Click Settings in the left panel for that campaign.
- Scroll to the Locations section and click the pencil icon to edit.
- To add locations, type a country, state, city, ZIP code, or address and click Search. Select from the dropdown and click Target or Exclude.
- For radius targeting, click Advanced search, then select Radius and enter an address and distance.
- To change the presence vs. interest setting, look for Location options (sometimes labeled “Advanced location options”) within the Locations section. Click it to expand, then select Presence: People in or regularly in your targeted locations.
- Save.
Common tasks at a glance:
- Bulk add locations: Use the Enter multiple locations option to paste a list of ZIP codes or city names at once.
- Bulk exclude: In Google Ads Editor, go to Keywords and Targeting → Locations, select the Negatives tab, and import a CSV. Prefix location names with a minus sign or add a “Negative” type column.
- Link Business Profile locations: Under location groups, select My business locations to target areas around your verified Google Business Profile addresses.
- Radius targeting: Available under Advanced search; set the center point and distance. Remember the 1 km minimum.
Campaign type differences matter here. Search and Display campaigns offer the full suite of advanced location options. Performance Max campaigns use location targeting at the campaign level but have fewer manual controls over the presence vs. interest distinction. Demand Gen campaigns offer “location of presence” and “location of interest” as separate options, giving you more granular control than standard Display. Always check which options are available after selecting your campaign type — the UI will show or hide options accordingly.
Practical best practices and conservative rules local advertisers should follow
The single most common mistake local advertisers make is setting a geographic target and never revisiting it. Geo targeting is not a set-and-forget decision. Here are the rules that consistently hold up:
- Analyze historical conversion data by geography before touching bids. Pull a location report, sort by conversions and CPA, and identify which ZIP codes or cities are actually delivering results. Bid adjustments should follow performance data, not assumptions about where your best customers live.
- Apply bid adjustments at the most specific level that has enough data. Google applies the most specific location-level adjustment rather than stacking multiple adjustments. If you set a +20% adjustment for Texas and a +10% for Austin, the Austin adjustment applies in Austin, not both combined.
- Exclude before you include. Build your exclusion list first when setting up a new service-area campaign. Exclusions override inclusions, so a ZIP code that is both included and excluded will receive no traffic.
- Align landing pages to the geographic target. An ad targeting “plumber in Denver” that lands on a generic homepage loses the geographic relevance signal. A page that mentions Denver, lists Denver service areas, and has a Denver phone number converts better.
- Do not over-constrict your target. Targets that are too small may not meet Google’s privacy thresholds and will serve intermittently or not at all. If you are seeing near-zero impressions on a very tight radius, widen it slightly or switch to ZIP-code targeting instead.
Pro Tip: When applying location bid adjustments, start conservatively. A +15% adjustment for a high-performing city is easier to justify and reverse than a +50% that distorts your overall campaign economics. Scale up only after two to three weeks of data confirm the CPA holds.
Consider a local landscaping company that was running a single campaign targeting the entire metro area of a mid-sized US city. After pulling a location report, they found that three ZIP codes in the outer suburbs accounted for a disproportionate share of clicks but almost no conversions. Excluding those ZIPs and tightening the radius to the core service area reduced wasted clicks noticeably and brought CPA down within the first month. The budget did not change — the geography did.
How to measure location performance and optimize by geography
The location performance report is the most underused tool in Google Ads for local businesses. Here is how to read it and what to do with it.

| Metric | What it signals | Recommended action |
|---|---|---|
| High impressions, low clicks in a ZIP | Low ad relevance or strong competition there | Test geo-specific ad copy or reduce bid |
| High clicks, low conversions in a city | Traffic quality issue or landing page mismatch | Audit landing page for geographic relevance; consider excluding |
| High CPA in a region | Inefficient spend | Reduce bid adjustment or exclude if CPA is unsalvageable |
| Low CPA, strong conversion rate in a ZIP | High-value pocket | Increase bid adjustment; consider a dedicated campaign |
| Zero impressions in a targeted area | Privacy threshold or conflicting exclusion | Widen target or check for overlapping excludes |
Steps to run a location performance report and act on it:
- In Google Ads, click Reports in the top navigation, then Predefined reports → Geographic.
- Set the date range to at least 30 days (90 days gives more reliable patterns).
- Add columns for Conversions, Cost per conversion, Conversion rate, and Clicks.
- Sort by Cost descending to see where budget is going first.
- Identify any location with high cost and low conversions. Cross-reference with your actual service area.
- For underperforming locations, either apply a negative bid adjustment (down to -90%) or add a full exclusion.
- For top-performing locations, apply a positive bid adjustment or consider splitting them into a dedicated campaign with a higher budget allocation.
- Repeat this review monthly. Geographic performance shifts with seasons, local competition, and business changes.
For businesses with physical locations, store visit conversions (available when your Google Business Profile is linked and you meet Google’s volume thresholds) add another layer. They let you attribute in-store visits to specific campaigns and locations, which is especially useful for multi-location retailers.
Folding location data into campaign automation is the next step once you have a few months of clean geographic data. Automated bidding strategies like Target CPA and Target ROAS can incorporate location signals, but they need historical conversion data by location to do it well.
Common geo-targeting mistakes and how to fix them
Most geo-targeting problems fall into a handful of repeatable errors.
Mistake 1: Leaving the default presence-or-interest setting when you need presence-only. Fix: Go to Settings → Locations → Location options and switch to “Presence: People in or regularly in your targeted locations.” This is the most impactful single change for service-area businesses.
Mistake 2: Forgetting to add exclusions. Fix: After setting your target area, immediately add exclusions for adjacent regions you cannot serve. Excluding locations is as important as including them — budget spent on unreachable customers is simply gone.
Mistake 3: Setting a radius that is too small. Fix: If impressions are near zero on a radius campaign, check whether the radius meets the 1 km minimum. If it does and impressions are still low, switch to ZIP-code targeting for the same area.
Mistake 4: Overlapping inclusions and exclusions. Fix: If you included a state and then excluded a city within it, the city exclusion wins. That is correct behavior, but it catches advertisers off guard. Map your inclusions and exclusions on paper before building the campaign.
Mistake 5: Using the wrong campaign type for the goal. Fix: Performance Max campaigns handle location targeting differently than Search. If you need granular control over presence vs. interest, Search campaigns give you more direct access to those settings.
Troubleshooting checklist when ads are not showing:
- Is the target area large enough to meet privacy thresholds?
- Is there a conflicting exclusion that overrides the inclusion?
- Does the campaign have sufficient budget to compete in that geography?
- Is the Ad Preview & Diagnosis tool showing the ad for a user in that location?
- Are the advanced location options set correctly for the campaign type?
The Ad Preview & Diagnosis tool (Tools → Ad Preview and Diagnosis) lets you simulate a search from a specific location without triggering an impression. Use it to verify that your ads actually appear for users in your target area before assuming a problem exists.
Advanced techniques and local use cases: store visits, service-area businesses, multi-location rollouts
Three configurations cover the majority of local business scenarios.
Storefront with radius targeting
Setup checklist:
- Set radius to 5–15 miles from the store address (adjust based on realistic drive time for your category).
- Use presence-only targeting.
- Link your Google Business Profile to enable location extensions and store visit measurement.
- Write ad copy that references the neighborhood or city name.
- Send traffic to a landing page that includes the store address, hours, and a map embed.
- Review the location report weekly for the first month to catch any radius bleed into non-serviceable areas.
Service-area business with presence-only plus exclusions
Setup checklist:
- Target specific ZIP codes or cities you serve rather than a broad radius.
- Set advanced location options to presence-only.
- Immediately exclude all adjacent ZIP codes and cities you do not serve.
- Build a shared negative location list if you run multiple campaigns covering the same service area.
- Align each ad group’s landing page to the specific city or ZIP it targets.
- Track phone calls and form submissions as conversions, segmented by location.
Multi-location rollout with campaign-per-region
Setup checklist:
- Create one campaign per region or city rather than one national campaign. This gives you independent budget control and cleaner performance data per market.
- Use bulk location upload (a CSV with location names or IDs) to populate each campaign’s target list efficiently.
- Apply shared negative keyword lists and shared negative location lists across all campaigns to prevent internal overlap.
- Set location-specific bid adjustments based on each market’s historical CPA after the first 30 days.
- Use UTM parameters on destination URLs to segment location-level performance in Google Analytics 4. A UTM tracking template applied at the campaign level makes this automatic.
- When scaling to many locations, Google Ads Editor’s bulk edit features and CSV import/export are faster than the web UI for managing location lists.
How Service Grower helps implement and scale geo-targeted Google Ads
Running geo-targeted campaigns well requires three things to work together: the right ad settings, landing pages that match the geographic target, and reporting that shows performance by location. Most local businesses struggle because those three pieces live in different tools or different vendors.
Service Grower brings them into one workflow. Here is what that looks like in practice:
- Managed Google Ads: Service Grower handles campaign setup, location targeting configuration, presence-only settings, exclusion lists, and bid adjustments — so you are not navigating the settings yourself.
- AnswerReady websites: Geo-aligned landing pages built to match your ad targets. If your campaign targets three ZIP codes, the landing page references those areas specifically, which improves Quality Score and conversion rate.
- GrowthView analytics: Location-level reporting that shows which areas are driving bookings and which are wasting budget, without requiring you to build custom reports in Google Ads.
- SmartRequest lead capture: Booking and inquiry forms embedded on geo-specific pages so leads are captured and attributed to the right campaign and location.
The benefit for a local business owner is a shorter path from “my ads are running” to “I know which neighborhoods are worth more budget.” Instead of piecing together data from Google Ads, Google Analytics, and your CRM, you get one consolidated view.
To see how this applies to your specific service area, book a 15-minute call at servicegrower.com/go. The first call covers an audit of your current location settings, a prioritized list of exclusions and bid adjustments, and a clear next step.
Key Takeaways
Geo targeting in Google Ads works best when you combine presence-only targeting, a tight exclusion list, and regular location performance reviews to guide bid adjustments by geography.
| Point | Details |
|---|---|
| Switch to presence-only | Change advanced location options from the default to “Presence” to stop showing ads to out-of-area searchers. |
| Exclusions override inclusions | Build your exclusion list first; any area both included and excluded will receive no traffic. |
| Use location reports monthly | Sort by cost and CPA to find underperforming ZIPs and redirect budget to high-converting areas. |
| Bid adjustments follow data | Apply location bid adjustments only after 30–90 days of conversion data, starting conservatively at ±15%. |
| Service Grower manages the full stack | Service Grower pairs managed Google Ads geo settings with AnswerReady landing pages and GrowthView reporting for coordinated local campaigns. |
Why most local advertisers get geo targeting backwards
The conventional advice is to cast a wide net first and narrow later. For geo targeting, that logic is expensive. Every day a campaign runs with presence-or-interest targeting and no exclusion list, it is paying for clicks from people who cannot become customers. That is not a small inefficiency — for a local business with a typical monthly ad budget, even a significant waste rate is a substantial amount going nowhere.
The smarter approach is to start conservative and expand based on evidence. Set presence-only from day one. Build the exclusion list before the campaign goes live. Run the location report after 30 days and look for ZIP codes with clicks but no conversions. Then, and only then, consider whether expanding the target area makes sense.
What most advertisers underestimate is how much geographic precision affects Quality Score. Google rewards ads that are relevant to the searcher’s context. An ad targeting a specific city, sending traffic to a page that mentions that city, and converting users who are physically in that city sends a coherent relevance signal. That coherence shows up in lower CPCs over time, not just better conversion rates.
The other thing worth saying plainly: Google’s location targeting is probabilistic, not a geofence. It uses device GPS, IP address, account history, and query content to estimate location. That means presence-only is not a perfect filter — it is a better filter. Treat it as a strong signal, not a guarantee, and let the location performance report show you where the leakage actually is.
What a managed geo-targeting setup actually looks like
Getting geo targeting right from the start saves weeks of cleanup later. Service Grower’s managed Google Ads service starts with a location audit: reviewing your current targeting settings, identifying missing exclusions, and mapping your ad targets against your actual service area.
From there, the setup includes presence-only targeting configured across all active campaigns, a ZIP-code-level exclusion list built from your service boundaries, and geo-aligned AnswerReady landing pages that match your ad copy to the areas you serve. GrowthView reporting gives you a monthly view of which locations are driving bookings and where budget is being wasted.
The first call takes 15 minutes. You walk away with a clear picture of what your current campaigns are doing by geography and a prioritized list of changes. Book that call at servicegrower.com/go and have your Google Ads account access ready so the audit can start immediately.
Useful sources and further reading
- Target ads to geographic locations — Google Ads Help
- About advanced location options — Google Ads Help
- Exclude ads from geographic locations — Google Ads Help
- Location targeting — Google Ads Help
- About bid adjustments — Google Ads Help
- Location target types by country — Google Ads Help
- Set location bid adjustments — Google Ads Editor Help
- Exclude locations — Google Ads Editor Help
- Checklist for location-based bid adjustments — PPC Marketing Hub